To access the settings of your NordnetBox via the Customer Area, you must use your Nordnet connection. Make sure it is switched on and connected to your computer system.
This function is reserved for Orange Statellite with Nordnet customers who own a NordnetBox Emotion.Emotion
From your Customer Area you can define the private IP address of your NordnetBox (the gateway) and manage its DHCP addressing plan (automatic allocation of IP addresses to your various devices).
To access the settings of your NordnetBox via the Customer Area, you must use your Nordnet connection. Make sure it is switched on and connected to your computer system.

If you have forgotten your username and/or password, click the Forgot your password? link.
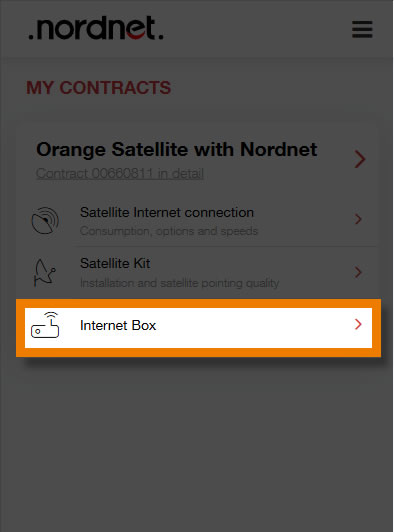
From the MY CONTRACTS section, click the Internet Box submenu.
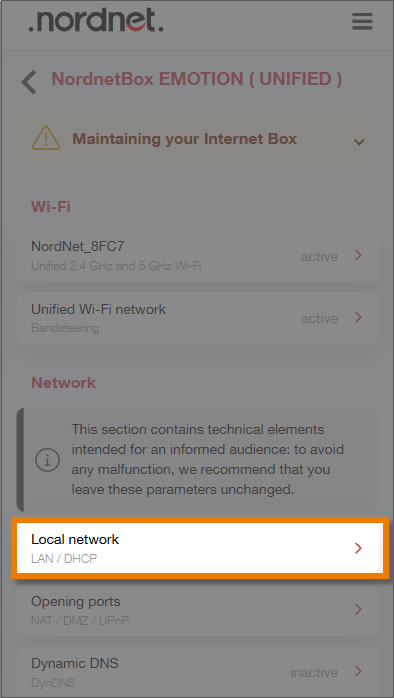
Click Local network.
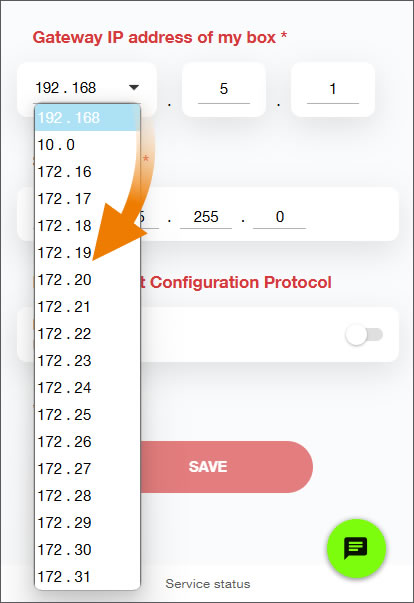
View or enter a new IP address for your gateway; if necessary, click the down arrow to choose another address class. The subnet mask is auto-completed.
To enable or disable the DHCP server, whose purpose is to automatically assign an IP address to each device wishing to connect to your NordnetBox, toggle the 1 switch to the right to enable it, or vice versa.
When the DHCP server is enabled, you can specify the range of IP addresses that the DHCP server can assign to these devices. To do this, enter the start IP address 2 and the end IP address 3. You are shown the names of dynamically available addresses 4.
You can adjust the length of time 5 during which the IP address will be allocated to this machine; by default, this is 24 hours.
Once you have made your changes, click the SAVE button.