Assistance Nordnet - NordnetBox Emotion - Configure your IP camera
Nordnet
FR | EN

NordnetBox Emotion - Configure your IP camera

Identifiant de l'article : 1519 Dernière mise à jour : 12/12/2024

This function is reserved for Orange Statellite with Nordnet customers who own a NordnetBox Emotion.

To access your surveillance camera from your local network or from outside, you need to assign it an IP address and know the TCP port at which you can reach it:

  • The IP address enables it to be identified by all the equipment on your local network (for explanations of your camera’s IP configuration, refer to its user guide or consult the manufacturer’s website).
  • When you know its TCP port number, you can configure your NordnetBox so that images can be viewed outside your local network.

This article shows you how to create a rule to identify your camera to your NordnetBox. This is equivalent to opening a port.

In our example, we’ll assign the local IP address 192.168.5.200 to the camera. The TCP port for viewing images is 8080. 

You can opt for this configuration if you have not changed the original network settings on your NordnetBox. If you have a Sagemcom 2704 router, you can use the address 192.168.59.200.
Access the NordnetBox configuration from your Customer Area

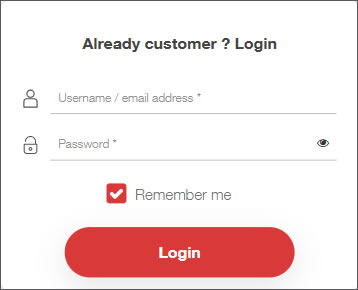
  • To access your Customer Area, click the following link: https: //client.nordnet.com
    Next, enter your Nordnet Customer Area username and password in the appropriate fields, and confirm.
  • Your username was given to you by Nordnet when you subscribed, in your Welcome email (or letter).

If you have forgotten your username and/or password, click the Forgot your password? link.

Manage your Box

You must use your Nordnet connection to access the settings for your NordnetBox. Make sure it is switched on and connected to your computer system. 

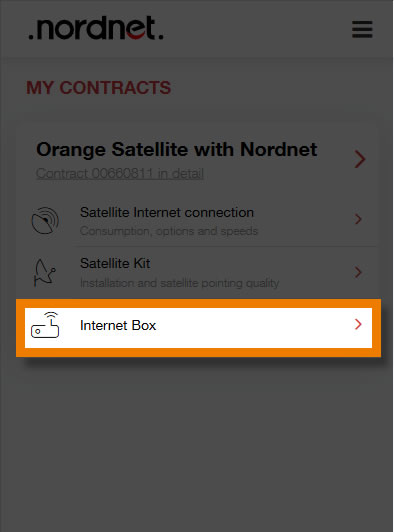
From the MY CONTRACTS section, click the Internet Box submenu.
 

Configure your camera in the NordnetBox

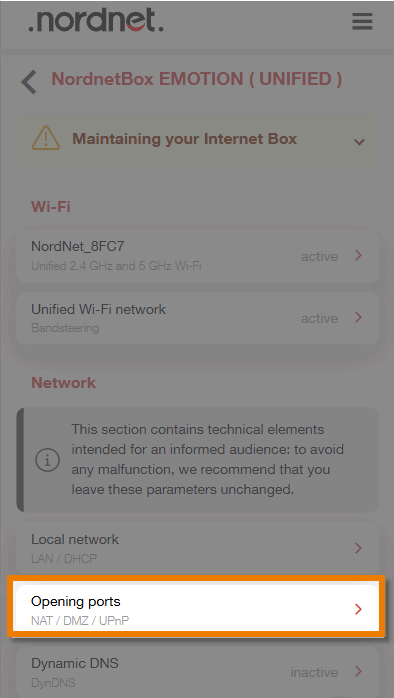
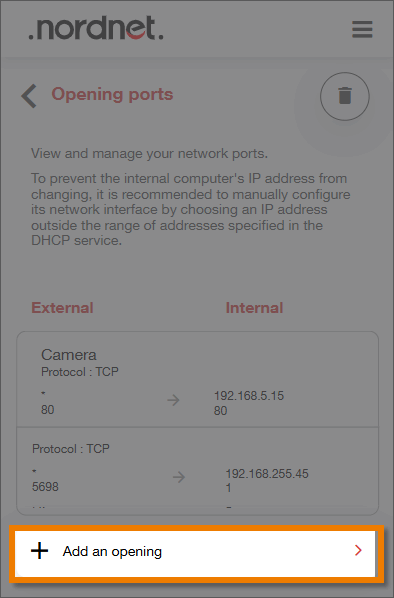
Click Opening ports.

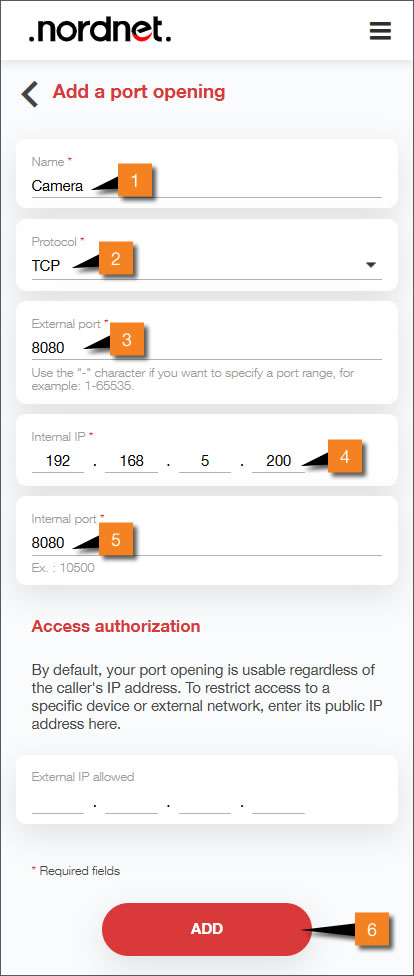
Click Add an opening.
Fill in the various fields as follows: 

  • In the “Name” field 1, enter the name that will be assigned to your camera.
  • In the “Protocol” field 2, select the protocol(s) that use this TCP / UDP / TCP + UDP service.
  • In the “External port” field 3, enter the port number via which you want to access your service.
  • In the “Internal IP” field 4, enter the IP address of the machine where the application is installed. 
  • In the “Internal port” field 5, enter the port number used by the application (its value is between 0 and 65535).
  • In the “Authorised external IP” field 6, leave blank, unless you want only the IP address to listen on this port. If so, enter the IP address of the remote machine.

To save your changes, click the ADD button, then SAVE.